What is Object Caching?
Object caching, also known as opcode or query cache, is a technique used to store frequently accessed data in memory (RAM) rather than retrieving it from your database each time. This approach significantly speeds up the loading of web pages by reducing the number of queries made on your database.
Think of object caching like storing frequently cooked meals in microwave-safe containers for quick reheating instead of cooking them all over again every time you need one. The idea is to minimize unnecessary work and improve overall performance!
How WordPress Handles Repeated Database Queries
WordPress relies heavily on its database to store and retrieve content, settings, and other data. However, each time a user requests any page or post from your site, it triggers numerous database queries that can be quite resource-intensive.
Imagine you’re browsing through an e-commerce platform with thousands of products; the query count could easily exceed 100 for just one product listing! To mitigate this issue, WordPress developers and third-party plugins have implemented various caching strategies to alleviate some pressure off your databases by storing data in RAM temporarily after it’s fetched from storage. This allows other users’ requests or even subsequent visits within a short timeframe access information more quickly because they don’t need an immediate database query every single time.
How Object Caching Improves Performance
By leveraging object caching, WordPress can improve performance significantly:
1. Faster page loads: Since the frequently accessed data is cached in RAM and served from there instead of going through slower disk I/O operations or even network roundtrips when using distributed databases like MySQL Cluster.
2. Reduced load on database servers. When a cache hit occurs, your site will skip executing that particular query against its backing store—either local file system-based storage for non-SQLite implementations (like SQLite) where applicable; otherwise aiming straight at whichever relational management system instance has been designated as the “main” data repository within said installation framework choices available currently worldwide today thanks largely due advancements technology alongside various innovative strategies pioneered specifically optimized efficiency across numerous scenarios encountered often!
3. Enhanced scalability: More users can now interact with your site simultaneously without showing a significant decrease in response times since repeated requests no longer result from accessing individual database entries every time someone views those same articles posts etc..
Benefits of Object Cache
Using object caching offers several benefits:
- Enhanced performance: Caching data reduces the load on databases and speeds up page loading.
- Reduced resource usage: By minimizing database queries, your site consumes fewer system resources (CPU, memory).
- Improved user experience: Faster response times ensure visitors enjoy a seamless browsing experience.
Enabling Object Cache
Checking Your Server Compatibility
Before you can use the wp-object-cache feature, ensure your server has support for caching. Check if PHP extensions necessary to implement this functionality are installed on your hosting environment.
For cPanel users: Log into your control panel > Software/Services or Modules section and check under “PHP Extensions.” Ensure both Redis and Memcached (if available) modules show as enabled.
In Linux environments: 1. Check if the php- redis package is installed using commands like: sudo dpkg -s php7.4 && sudo apt-get install libpcre3-dev build-essential
For custom hosting environments: Consult your hosting provider’s documentation or support for guidance on verifying and enabling the necessary PHP extensions.
Redis Plugin
Now that we’ve confirmed compatibility is in place proceed setting up our chosen caching engine via WordPress dashboard.
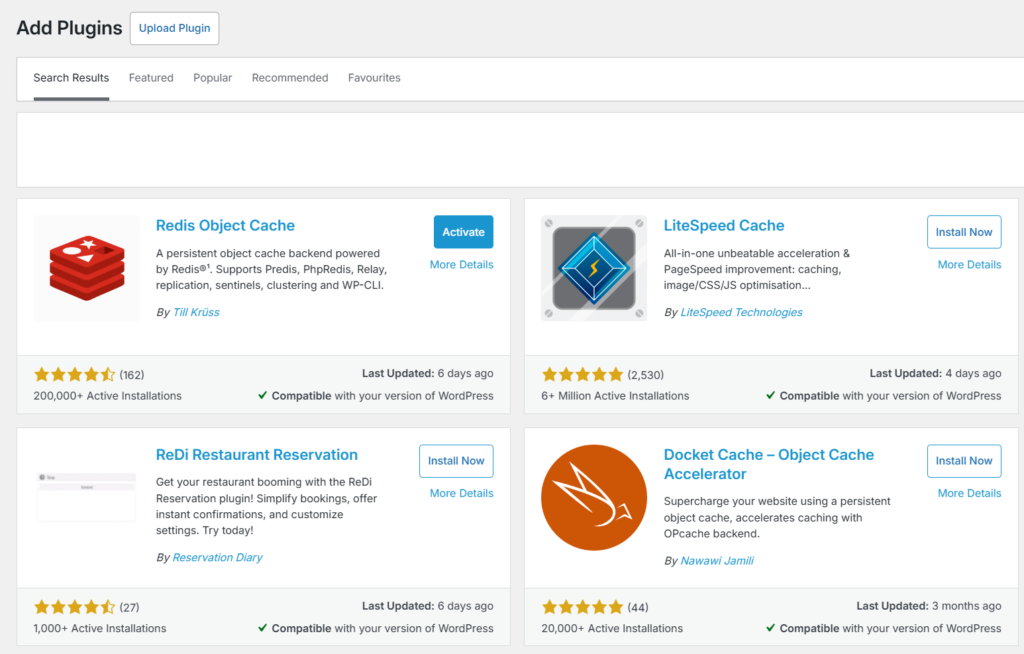
1. Search “Redis” and select the plugin by Till Krüss.
2. On next page click the Install button present there at bottom section followed immediately clicking blue Activate button once it’s done downloading.

Modifying Redis Plugin Variables
After installing the plugin, modify your wp-config.php file to add these constants:
// Add this configuration block at end of /wp-admin/includes/config-wpredis.php
define('WP_REDIS_PREFIX', 'your-unique-prefix'); // Replace with a human-readable identifier (e.g., website name)
define('WP_REDIS_MAXTTL', 3600 * 4); // The maximum TTL for all cached keys.
define('WP_REDIS_IGBINARY', true);
Optionally, if you have a Redis password, which is ideal for security reasons, you can also add:
define('WP_REDIS_PASSWORD', 'password-goes-here');Wrapping Up
You have now successfully enabled object caching using Redis in WordPress, which should improve your site’s performance. Be sure to monitor the plugin’s settings and adjust as needed for optimal results.
Also remember that proper management of resources is key—keeping an eye on server usage will ensure smooth operation without hitting any critical limits or consuming unnecessary system assets unnecessarily.


